We use cookies to make your experience better. To comply with the new e-Privacy directive, we need to ask for your consent to set the cookies. Learn more.
 FAST AND FREE SHIPPING
 ONE OF A KIND PATIO UMBRELLA
 BEST WARRANTY AND SERVICE IN THE MARKET
 Instructions for your Baser Product
Assembly Guidelines
Welcome to Baser’s Assembly Guide, your trusted resource for setting up Baser products with ease. Whether you’re assembling an umbrella base, weight bags, or patio umbrellas, our step-by-step instructions and troubleshooting tips ensure a fast, secure, and hassle-free setup. Get ready to enjoy a stable and stylish outdoor space in no time.
Original & Heavy Duty
Beach & Balcony
Sandbags & Weight Bags
Center Pole Umbrellas
Cantilever Umbrellas
Covers for Umbrellas
Assembly Guidelines
Original Umbrella Base & Heavy Duty Umbrella Base
Struggling with assembling your Baser umbrella base or facing common setup challenges? Our comprehensive guide is here to help.
Easy Setup
As Easy as 1-2-3
Learn how to seamlessly assemble your Baser umbrella base, address issues like an over-inserted L-shape lock or a spinning patio umbrella.
Whether it’s adjusting the locking ring or ensuring a snug fit to prevent spinning, our step-by-step instructions provide all the answers.
Make assembly hassle-free and enjoy a stable, secure shade in no time. Check out our 'Baser Umbrella Base Assembly Guide' for solutions to common problems and expert tips for a perfect setup.
Frequently Asked Questions
No Question Is Too Small or Silly
Asking the right questions is crucial.
We're here to answer all of them. If you don't find what you're looking for, feel free to delve into our extensive FAQ guide or have a chat with us.
Prefer email? Reach out to us at help @mybaser.com. During our peak season from April to August, we ensure a response within 24 hours. Your queries matter to us, and we're committed to providing timely and helpful support.
My patio umbrella keeps spinning in the base - What to do?
What to do if the locking ring is stuck?
How do I get the locking ring up?
How do I disassemble the umbrella base?
Is your problem not listed? We are here to help!
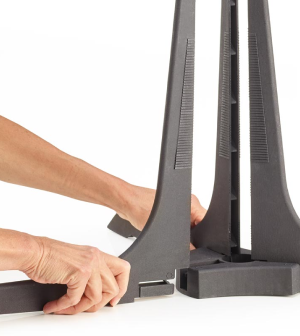
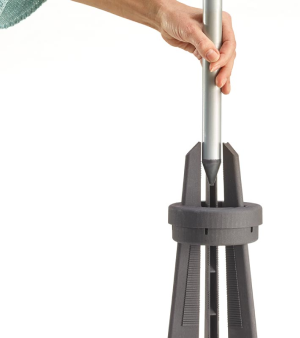
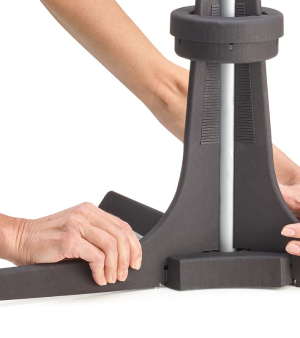
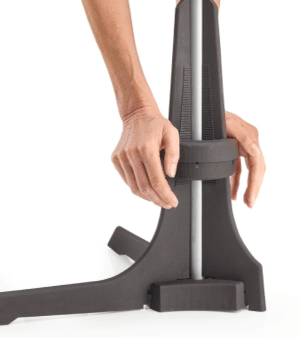
Assembly Guide Heavy Duty and Original Umbrella Base from Baser

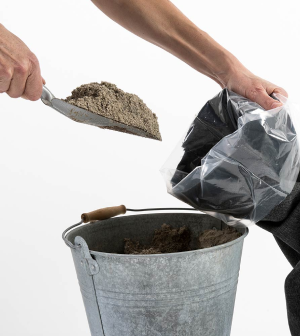
1) Fill the sandbags with sand by placing the inner plastic bag inside before adding sand.
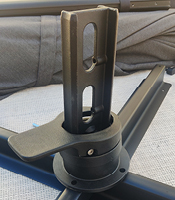
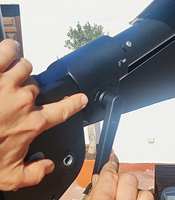
2) Push the L-shapes into the base until they reach the edge of the ring at the bottom.
3) Place the ring loosely on top and insert the umbrella pole.
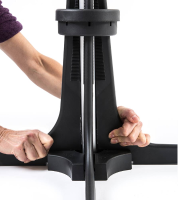
4) Push the L-shapes as close as possible to the umbrella pole so they touch.
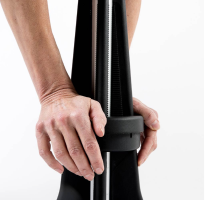
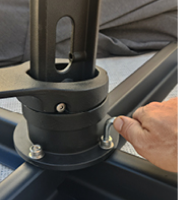
5) Now push the ring down to lock in the umbrella pole,
pushing all the way down to the last "click".
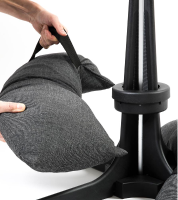
6) Place the sandbags on top of the base and you are ready to go.
Assembly Guidelines
Spacesaver Balcony Base & Beach Umbrella Base
Struggling with assembling your Baser Balcony Umbrella Base or Beach Umbrella Base? Or perhaps you are facing common setup challenges? Our comprehensive guide is here to help.
Easy Setup
As Easy as 1-2-3
Learn how to easily assemble your Baser Spacesaver Umbrella Base, with guidance on specific issues like ensuring a proper fit with the shorter leg for tight spaces or positioning the sandbags to maximize stability.
From adjusting the L-shape lock to securing the locking ring and preventing any unwanted spinning, our step-by-step instructions cover everything you need to know.
Enjoy a simple assembly process and a sturdy, secure shade setup in no time. Explore our 'Baser Spacesaver Umbrella Base Assembly Guide' for expert solutions and tips on getting the most out of your base.
Frequently Asked Questions
No Question Is Too Small or Silly
Asking the right questions is crucial.
We're here to answer all of them. If you don't find what you're looking for, feel free to delve into our extensive FAQ guide or have a chat with us.
Prefer email? Reach out to us at help @mybaser.com. During our peak season from April to August, we ensure a response within 24 hours. Your queries matter to us, and we're committed to providing timely and helpful support.
My patio umbrella keeps spinning in the base - What to do?
What to do if the locking ring is stuck?
How do I get the locking ring up?
How do I disassemble the umbrella base?
Is your problem not listed? We are here to help!
Assembly Guide Spacesaver and Beach Umbrella Base from Baser
1) Fill the sandbags with sand by placing the inner plastic bag inside before adding sand.
2) Push the L-shapes into the base until they reach the edge of the ring at the bottom.
3) Place the ring loosely on top and insert the umbrella pole.
4) Push the L-shapes as close as possible to the umbrella pole so they touch.
5) Now push the ring down to lock in the umbrella pole, pushing all the way down to the last "click".
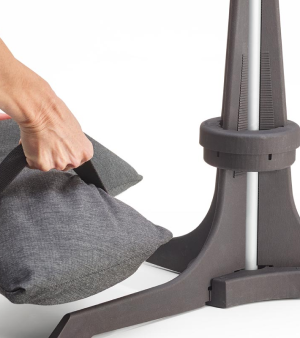
6) Place the sandbags on top of the base and you are ready to go.
Assembly Guidelines
Push Up Patio Umbrella, Crank, Balcony or Beach?
To guide you perfectly, just tell us: is your patio umbrella a crank or a push type? We're here to help every step of the way.
Original & Supreme Push

Supreme Crank
Balcony & Beach
Assembly Guidelines
Original and Supreme Push Patio Umbrella
Struggling with assembling your Baser Original or Supreme Push Patio Umbrella? Or perhaps you are facing common setup challenges? Our comprehensive guide is here to help.
Easy Setup
As Easy as 1-2-3
Learn how to seamlessly set up your Baser Original or Supreme Push Patio Umbrella, including tips to address issues like securing the canopy at the perfect angle and ensuring smooth push-to-tilt adjustments.
Whether it’s locking the canopy in place or adjusting the patio umbrella height for optimal shade, our step-by-step instructions cover all the details.
Make assembly and setup hassle-free, so you can enjoy a stable, secure shade in no time. Check out our 'Baser Original Patio Umbrella Assembly Guide' for solutions to common issues and expert tips for a perfect setup.
Frequently Asked Questions
No Question Is Too Small or Silly
Asking the right questions is crucial.
We're here to answer all of them. If you don't find what you're looking for, feel free to delve into our extensive FAQ guide or have a chat with us.
Prefer email? Reach out to us at help @mybaser.com. During our peak season from April to August, we ensure a response within 24 hours. Your queries matter to us, and we're committed to providing timely and helpful support.
My patio umbrella keeps spinning in the base - What to do?
How do I push up the patio umbrella?
How do I get the patio umbrella to stay up?
How do I close the patio umbrella?
Is your problem not listed? We are here to help!
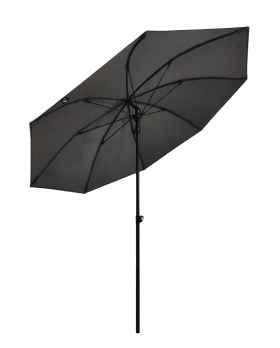
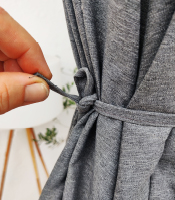
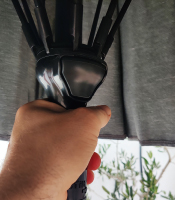
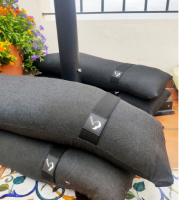
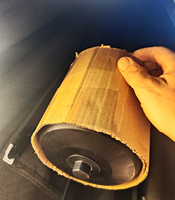
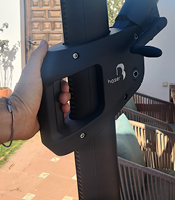
Assembly Guide Original and Supreme Push Patio Umbrella from Baser
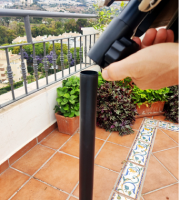
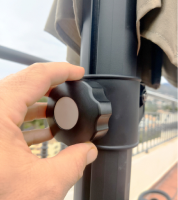
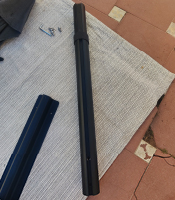
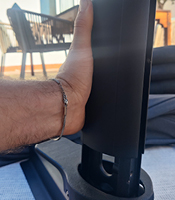
1) Secure the lower tube into the Baser umbrella base.
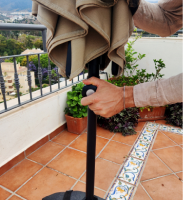
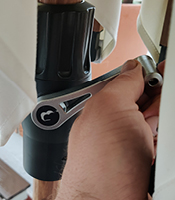
2) Insert the upper part of the patio umbrella into the tube and tighten the height adjustment lever.

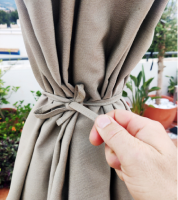
3) Loosen the fabric strap.
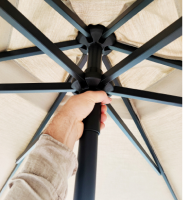
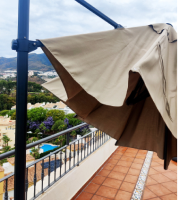
4) Pull out the ribs so you can grab the handle and push upwards.
Assembly Guidelines
Supreme Crank Patio Umbrella
Struggling with assembling your Baser Supreme Crank Patio Umbrella? Or perhaps you are facing common setup challenges? Our comprehensive guide is here to help.
Easy Setup
As Easy as 1-2-3
Learn how to set up your Baser Supreme Crank Patio Umbrella with ease, including tips for smooth crank operation and securing the canopy at the perfect angle.
Our step-by-step instructions guide you through adjusting the tilt, locking the canopy in place, and using the crank mechanism for effortless opening and closing.
Make setup a breeze and enjoy reliable, stylish shade in no time. Check out our 'Baser Supreme Crank Patio Umbrella Assembly Guide' for expert tips and solutions to common setup questions.
Frequently Asked Questions
No Question Is Too Small or Silly
Asking the right questions is crucial.
We're here to answer all of them. If you don't find what you're looking for, feel free to delve into our extensive FAQ guide or have a chat with us.
Prefer email? Reach out to us at help @mybaser.com. During our peak season from April to August, we ensure a response within 24 hours. Your queries matter to us, and we're committed to providing timely and helpful support.
My patio umbrella keeps spinning in the base - What to do?
How to get the patio umbrella to tilt?
How do I close the patio umbrella?
Is your problem not listed? We are here to help!
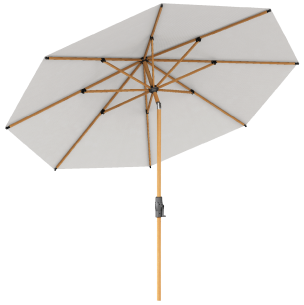
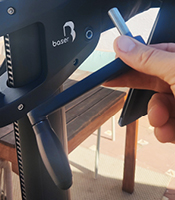
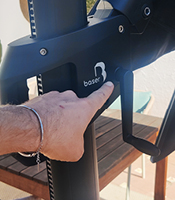
Assembly Guide Supreme Crank Patio Umbrella from Baser
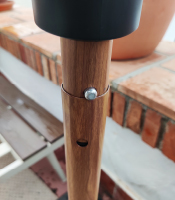
1) Insert the lower pole into the Baser umbrella base and place the top part of the patio umbrella on it.
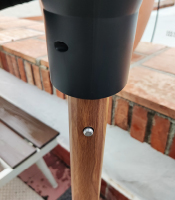
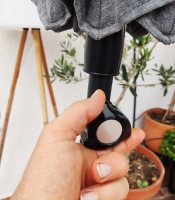
2) Press the gray metal button to attach the top part securely to the lower pole, ensuring the button clicks into the hole on the lower tube.
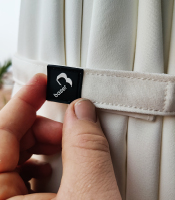
3) Unfasten the fabric strap.
4) Rotate clockwise to open the patio umbrella and counterclockwise to close it.
Assembly Guidelines
Compact Balcony and Beach Patio Umbrella
Struggling with assembling your Baser Compact Balcony or Beach Patio Umbrella? Or perhaps you are facing common setup challenges? Our comprehensive guide is here to help.
Easy Setup
As Easy as 1-2-3
Learn how to easily set up your Baser Balcony and Beach Patio Umbrella, including tips for securing it in compact spaces and adjusting the canopy for ideal coverage.
Our step-by-step instructions guide you through securing the patio umbrella to balcony railings, locking the canopy in place, and adjusting the angle to maximize shade.
Enjoy a simple setup and dependable shade designed for small spaces. Check out our 'Baser Balcony Patio Umbrella and Beach Patio Umbrella Assembly Guide' for expert tips and solutions to common setup questions.
Frequently Asked Questions
No Question Is Too Small or Silly
Asking the right questions is crucial.
We're here to answer all of them. If you don't find what you're looking for, feel free to delve into our extensive FAQ guide or have a chat with us.
Prefer email? Reach out to us at help @mybaser.com. During our peak season from April to August, we ensure a response within 24 hours. Your queries matter to us, and we're committed to providing timely and helpful support.
My patio umbrella keeps spinning in the base - What to do?
How to get the patio umbrella to tilt?
How do I close the patio umbrella?
Is your problem not listed? We are here to help!
Assembly Guide Compact Balcony Patio Umbrella and Beach Patio Umbrella from Baser
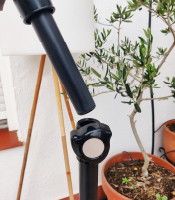
1) Secure the lower tube into the Baser umbrella base.
2) Insert the upper part of the patio umbrella and tighten the height adjustment lever.
3) Loosen the fabric strap.
4) Pull out the ribs so you can grab the handle and push upwards.
Assembly Guidelines
Original or Supreme Cantilever?
To guide you perfectly, just tell us: is your cantilever the Original or the Supreme? We're here to help every step of the way.
Original
Supreme
Assembly Guidelines
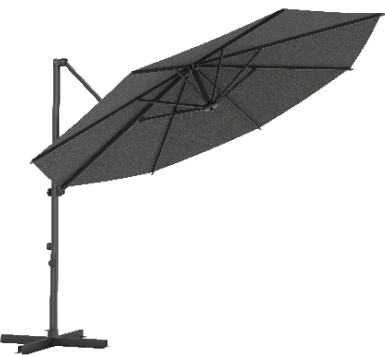
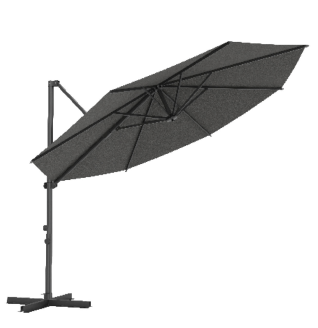
Original Cantilever
Struggling with assembling your Baser Original Cantilever Patio Umbrella? Or perhaps you are facing common setup challenges? Our comprehensive guide is here to help.
Easy Setup
As Easy as 1-2-3
Learn how to set up your Baser Original Cantilever Patio Umbrella with ease, including tips for positioning, securing, and adjusting the canopy for maximum shade.
Our step-by-step instructions guide you through stabilizing the cantilever arm, adjusting the tilt and height, and locking the canopy in place to prevent any unwanted movement.
Make setup hassle-free and enjoy a sturdy, stylish shade in no time. Check out our 'Baser Original Cantilever Patio Umbrella Assembly Guide' for expert tips and solutions to common setup questions.
Frequently Asked Questions
No Question Is Too Small or Silly
Asking the right questions is crucial.
We're here to answer all of them. If you don't find what you're looking for, feel free to delve into our extensive FAQ guide or have a chat with us.
Prefer email? Reach out to us at help @mybaser.com. During our peak season from April to August, we ensure a response within 24 hours. Your queries matter to us, and we're committed to providing timely and helpful support.
How to tilt and turn my cantilever?
How do I close my cantilever?
Is your problem not listed? We are here to help!
11 Easy Steps to Assemble Your Baser Original Cantilever Patio Umbrella

1) Find the 4 small bolts and discs.
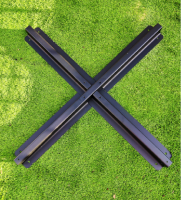
2) Place the 2 pieces of the base on top of each other to form a cross.
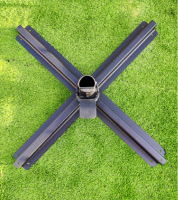
3) Screw the pedal to the cross base with the 4 small bolts and washers.
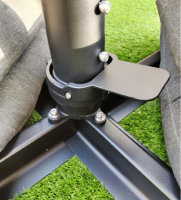
4) Attach the center tube with the 2 large bolts. Remember to screw them on alternately.
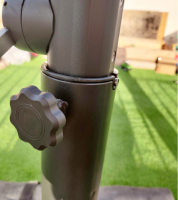
5) Attach the umbrella pole to the tube and screw it on tightly.
6) Add your desired weight. We suggest Baser sandbags for cantilevers.
7) Loosen the fabric strap.
8) Turn and open the tilt function.
9) Lift the umbrella up and tighten the tilt function.
10) Turn clockwise to open and counter-clockwise to close.
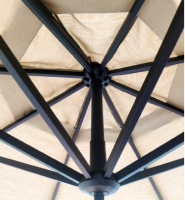
11) Crank until the umbrella is fully open so that the center pole and the joining point of the ribs are together.
Assembly Guidelines
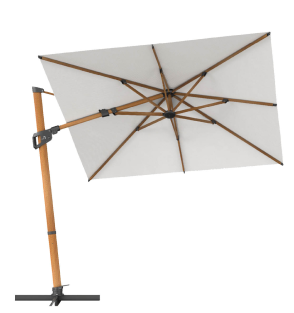
Supreme Cantilever
Struggling with assembling your Baser Supreme Cantilever Patio Umbrella? Or perhaps you are facing common setup challenges? Our comprehensive guide is here to help.
Easy Setup
As Easy as 1-2-3
Learn how to set up your Baser Supreme Cantilever Patio Umbrella effortlessly, with guidance on positioning, securing, and adjusting the canopy for optimal shade.
Our step-by-step instructions cover stabilizing the cantilever arm, adjusting the canopy’s tilt and rotation, and locking it securely in place for steady performance even in breezy conditions.
Enjoy a quick setup and reliable shade solution. Check out our 'Baser Supreme Cantilever Patio Umbrella Assembly Guide' for expert tips and solutions to common setup questions.
Frequently Asked Questions
No Question Is Too Small or Silly
Asking the right questions is crucial.
We're here to answer all of them. If you don't find what you're looking for, feel free to delve into our extensive FAQ guide or have a chat with us.
Prefer email? Reach out to us at help @mybaser.com. During our peak season from April to August, we ensure a response within 24 hours. Your queries matter to us, and we're committed to providing timely and helpful support.
How to tilt and turn my cantilever?
How to use the left and right tilt?
How do I close the cantilever?
Is your problem not listed? We are here to help!
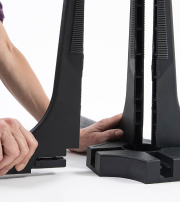
20 Easy Steps to Assemble Your Baser Supreme Cantilever Patio Umbrella

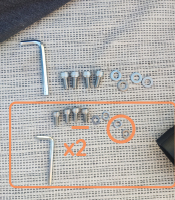
1) Arrange all components on a soft surface to avoid scratches.
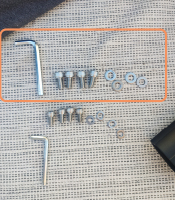
2) Organize your hardware. Focus on the large bolts and round washers for the initial steps.
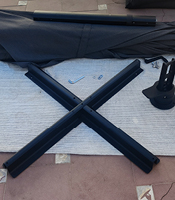
3) Stack the two base pieces together, forming a cross.
4) Position the turning base atop the cross.
5) Secure the turning base to the cross with 4 large bolts and washers.
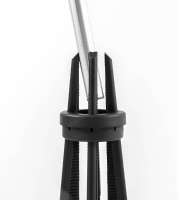
6) Locate the lower tube.
7) Attach the lower tube to the turning base.
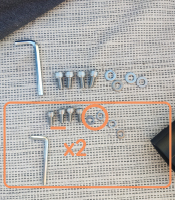
8) Find 2 small bolts and 2 washers with two square sides.
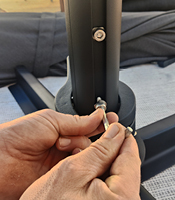
9) Fasten the lower tube firmly, alternating turns for even tightness.
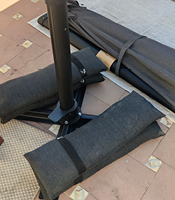
10) Place weights at the base for stability. Baser sandbags are recommended for cantilevers.
11) Align the cantilever's top section with the lower tube.
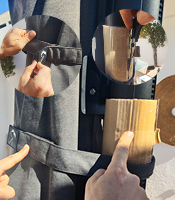
12) Discard the protective cardboard and unravel the fabric strap.
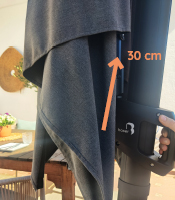
13) Lift the handle to raise the cantilever about 30 cm.
14) Find the remaining 2 small bolts and the 2 washers with 2 squared sides.
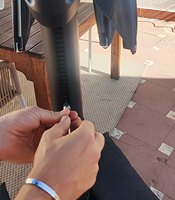
15) Use the remaining small bolts and washers to connect the upper cantilever to the lower pole.
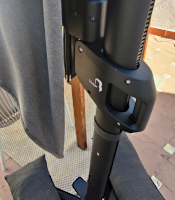
16) Remove any internal protective cardboard.
17) Adjust the cantilever height by moving the handle up or down. Fully extend to open the cantilever.
18) Locate the crank handle.
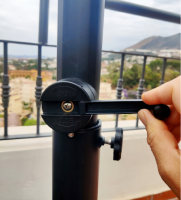
19) Insert the crank handle into the slot near the Baser logo and rotate clockwise to open, counterclockwise to close.
20) For left and right tilt, place the crank handle into the slot on the cantilever arm and turn accordingly.
Assembly Guidelines
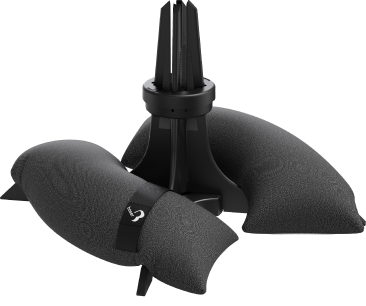
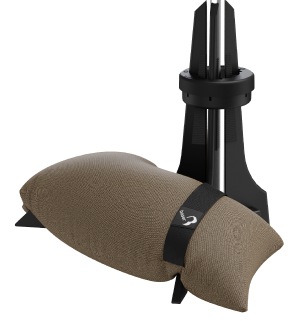
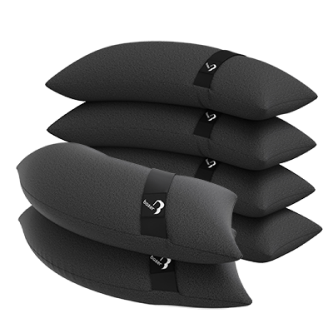
Original Sandbags & Weight Bags for Cantilevers
Struggling with assembling your Baser Original Sandbags and Weight Bags or facing common setup challenges? Our comprehensive guide is here to help.
Easy Setup
As Easy as 1-2-3
Learn how to effortlessly set up your Baser sandbags and weight bags, with clear guidance on filling, positioning, and securing them for optimal stability.
Our step-by-step instructions cover exactly how much sand to fill in and where to place them to keep your outdoor items steady, even in breezy conditions.
Enjoy a quick setup and reliable stability solution. Check out our 'Baser Sandbags Assembly Guide' for expert tips and answers to common setup questions.
Frequently asked questions
No Question is Too Small or Silly
Asking the right questions is crucial.
We're here to answer all of them. If you don't find what you're looking for, feel free to delve into our extensive FAQ guide or have a chat with us.
Prefer email? Reach out to us at help @mybaser.com. During our peak season from April to August, we ensure a response within 24 hours. Your queries matter to us, and we're committed to providing timely and helpful support.
How much sand do I need?
Should I fill the sandbags all the way to the top?
How to close the inside plastic bag?
Can I wash the sandbags?
Is your problem not listed? We are here to help!
4 Easy Steps to Assemble Your Baser Sandbag
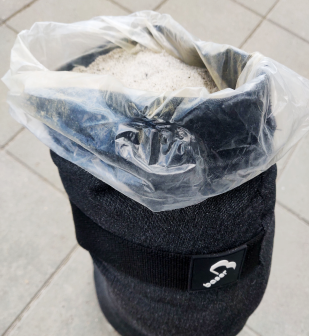
1) Fill the sandbags with sand or gravel. Dry or wet.
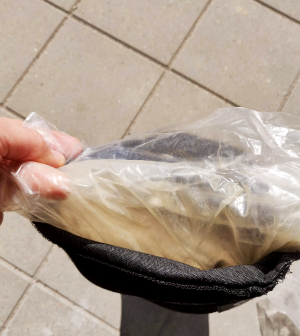
2) Fold the plastic bag several times. The sand will not fall out.
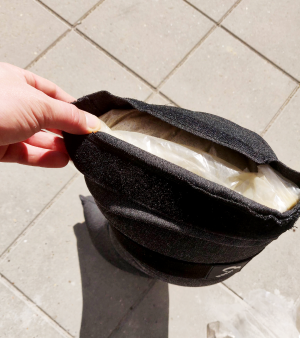
3) Close the strong velcro fastener.
4) Place the sandbag where you need stability.
Assembly Guidelines
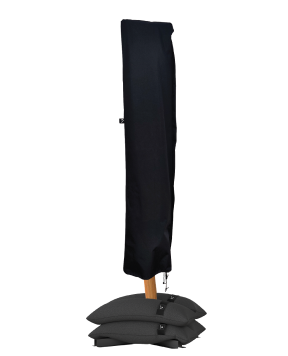
Supreme Baser Patio Umbrella and Cantilever Protection Covers
Struggling with assembling your Baser Patio Umbrella Cover or facing common setup challenges? Our comprehensive guide is here to help.
Easy setup
As Easy as 1-2-3
Learn how seamless it is to protect your parasol or cantilever with Baser Supreme Protective Covers.
Whether you're unsure where to insert the lifting rod or wondering if the cover is washable, our step-by-step instructions provide all the answers.
Make use hassle-free and enjoy a protected parasol or cantilever in no time. Check out our 'Baser Cover Assembly Guide' for solutions to common problems and expert tips for a perfect setup.
Frequently Asked Questions
No Question Is Too Small or Silly
Asking the right questions is crucial.
We're here to answer all of them. If you don't find what you're looking for, feel free to delve into our extensive FAQ guide or have a chat with us.
Prefer email? Reach out to us at help @mybaser.com. During our peak season from April to August, we ensure a response within 24 hours. Your queries matter to us, and we're committed to providing timely and helpful support.
Can I leave the cover outside all year long?
Can I wash the cover?
My cover is too small? What do I do?
Is your problem not listed? We are here to help!
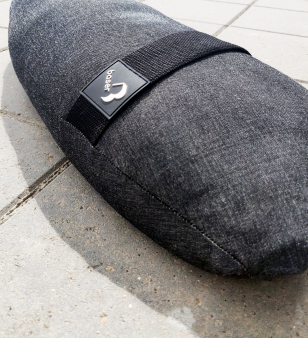
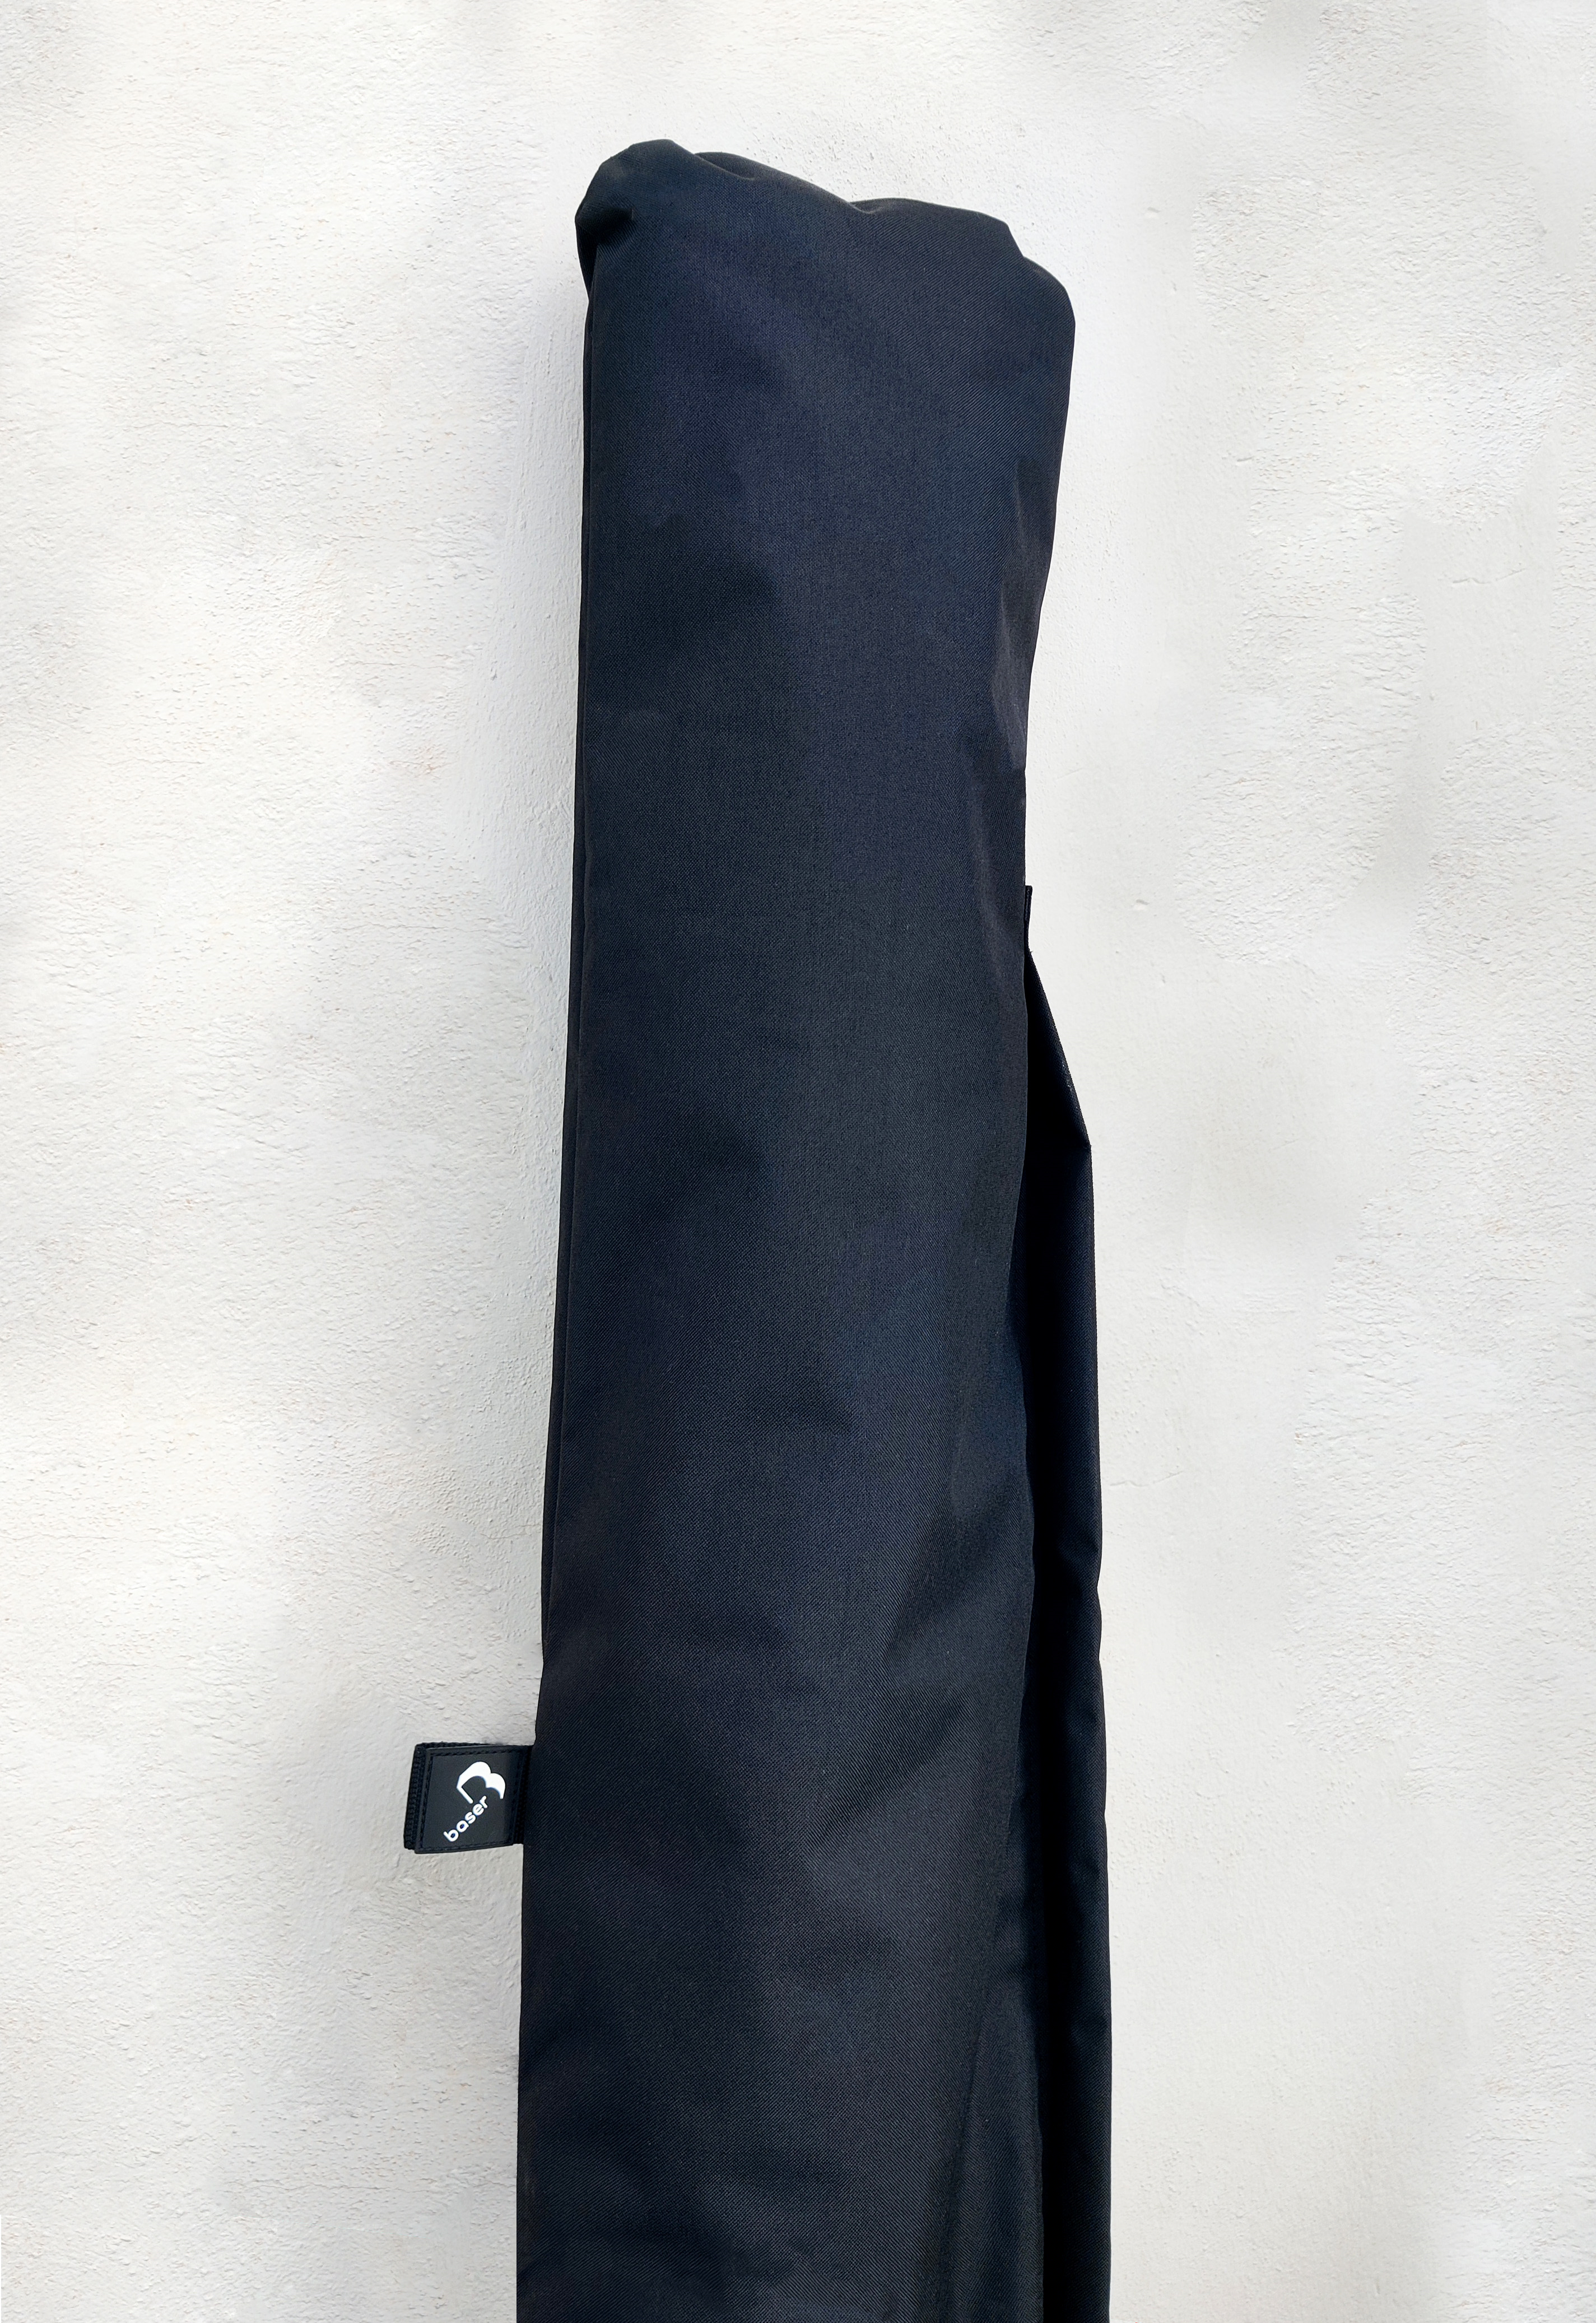
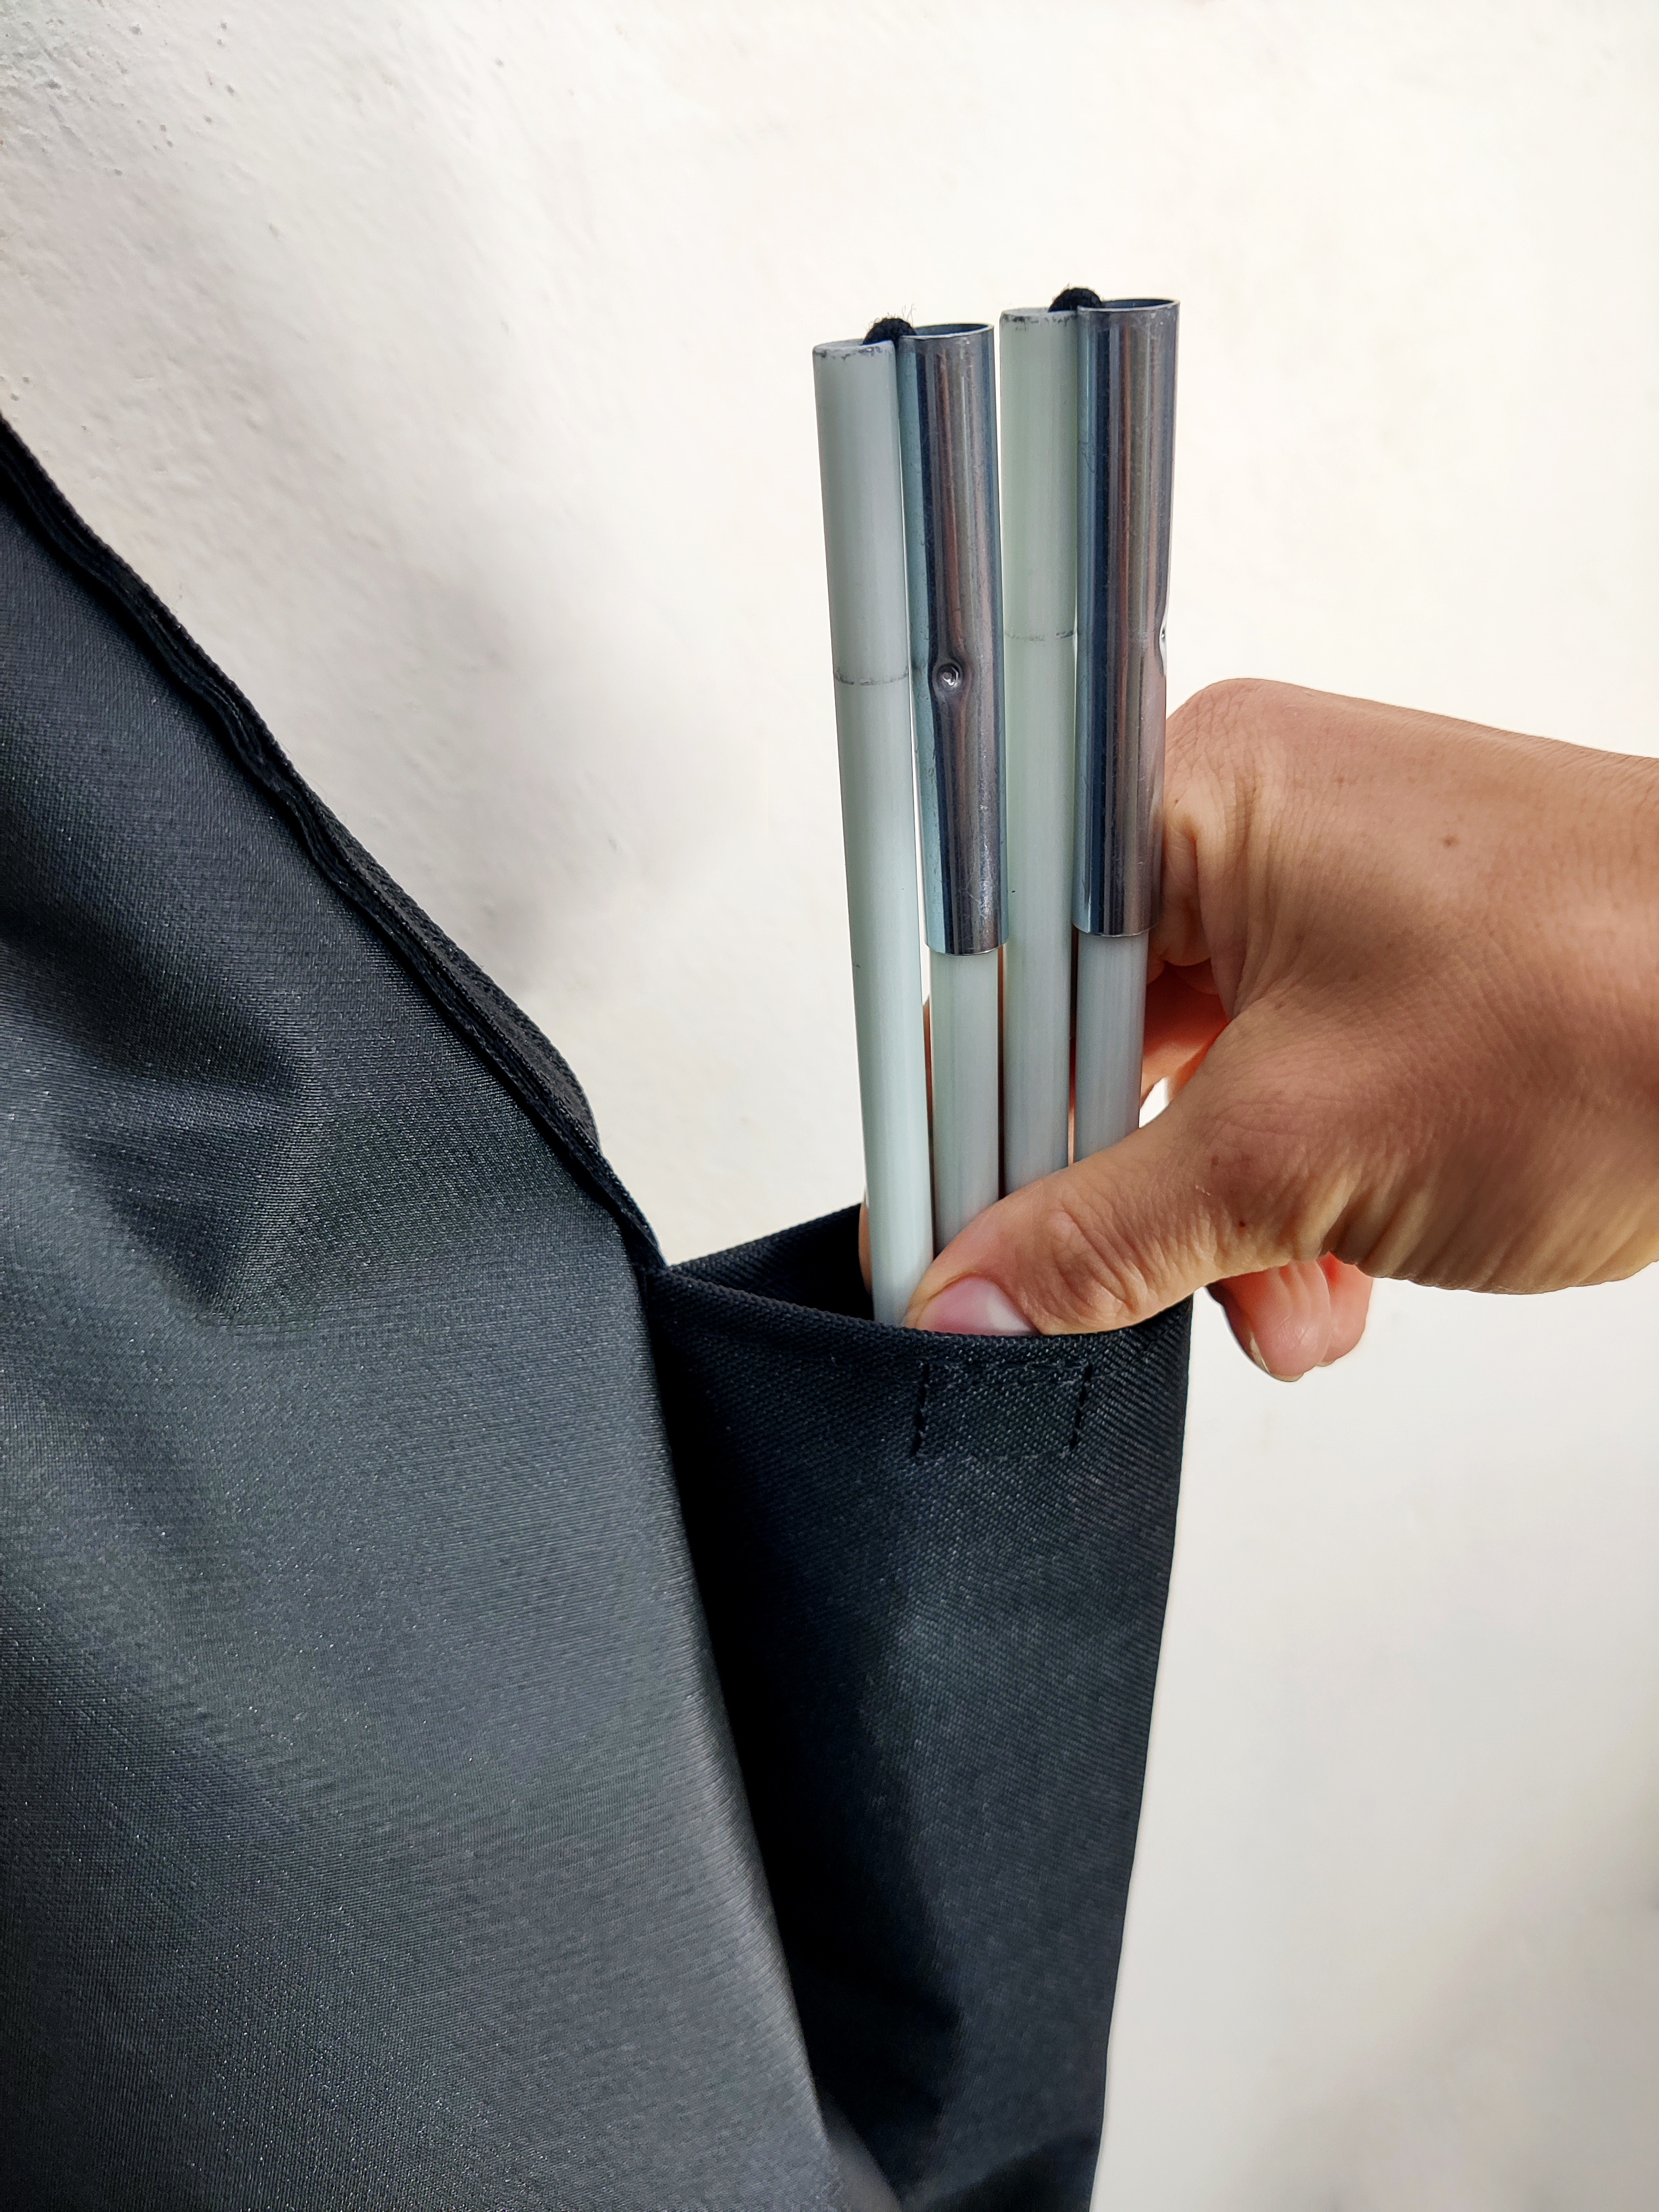
5 Easy Steps to Assemble Your Baser Protection Cover
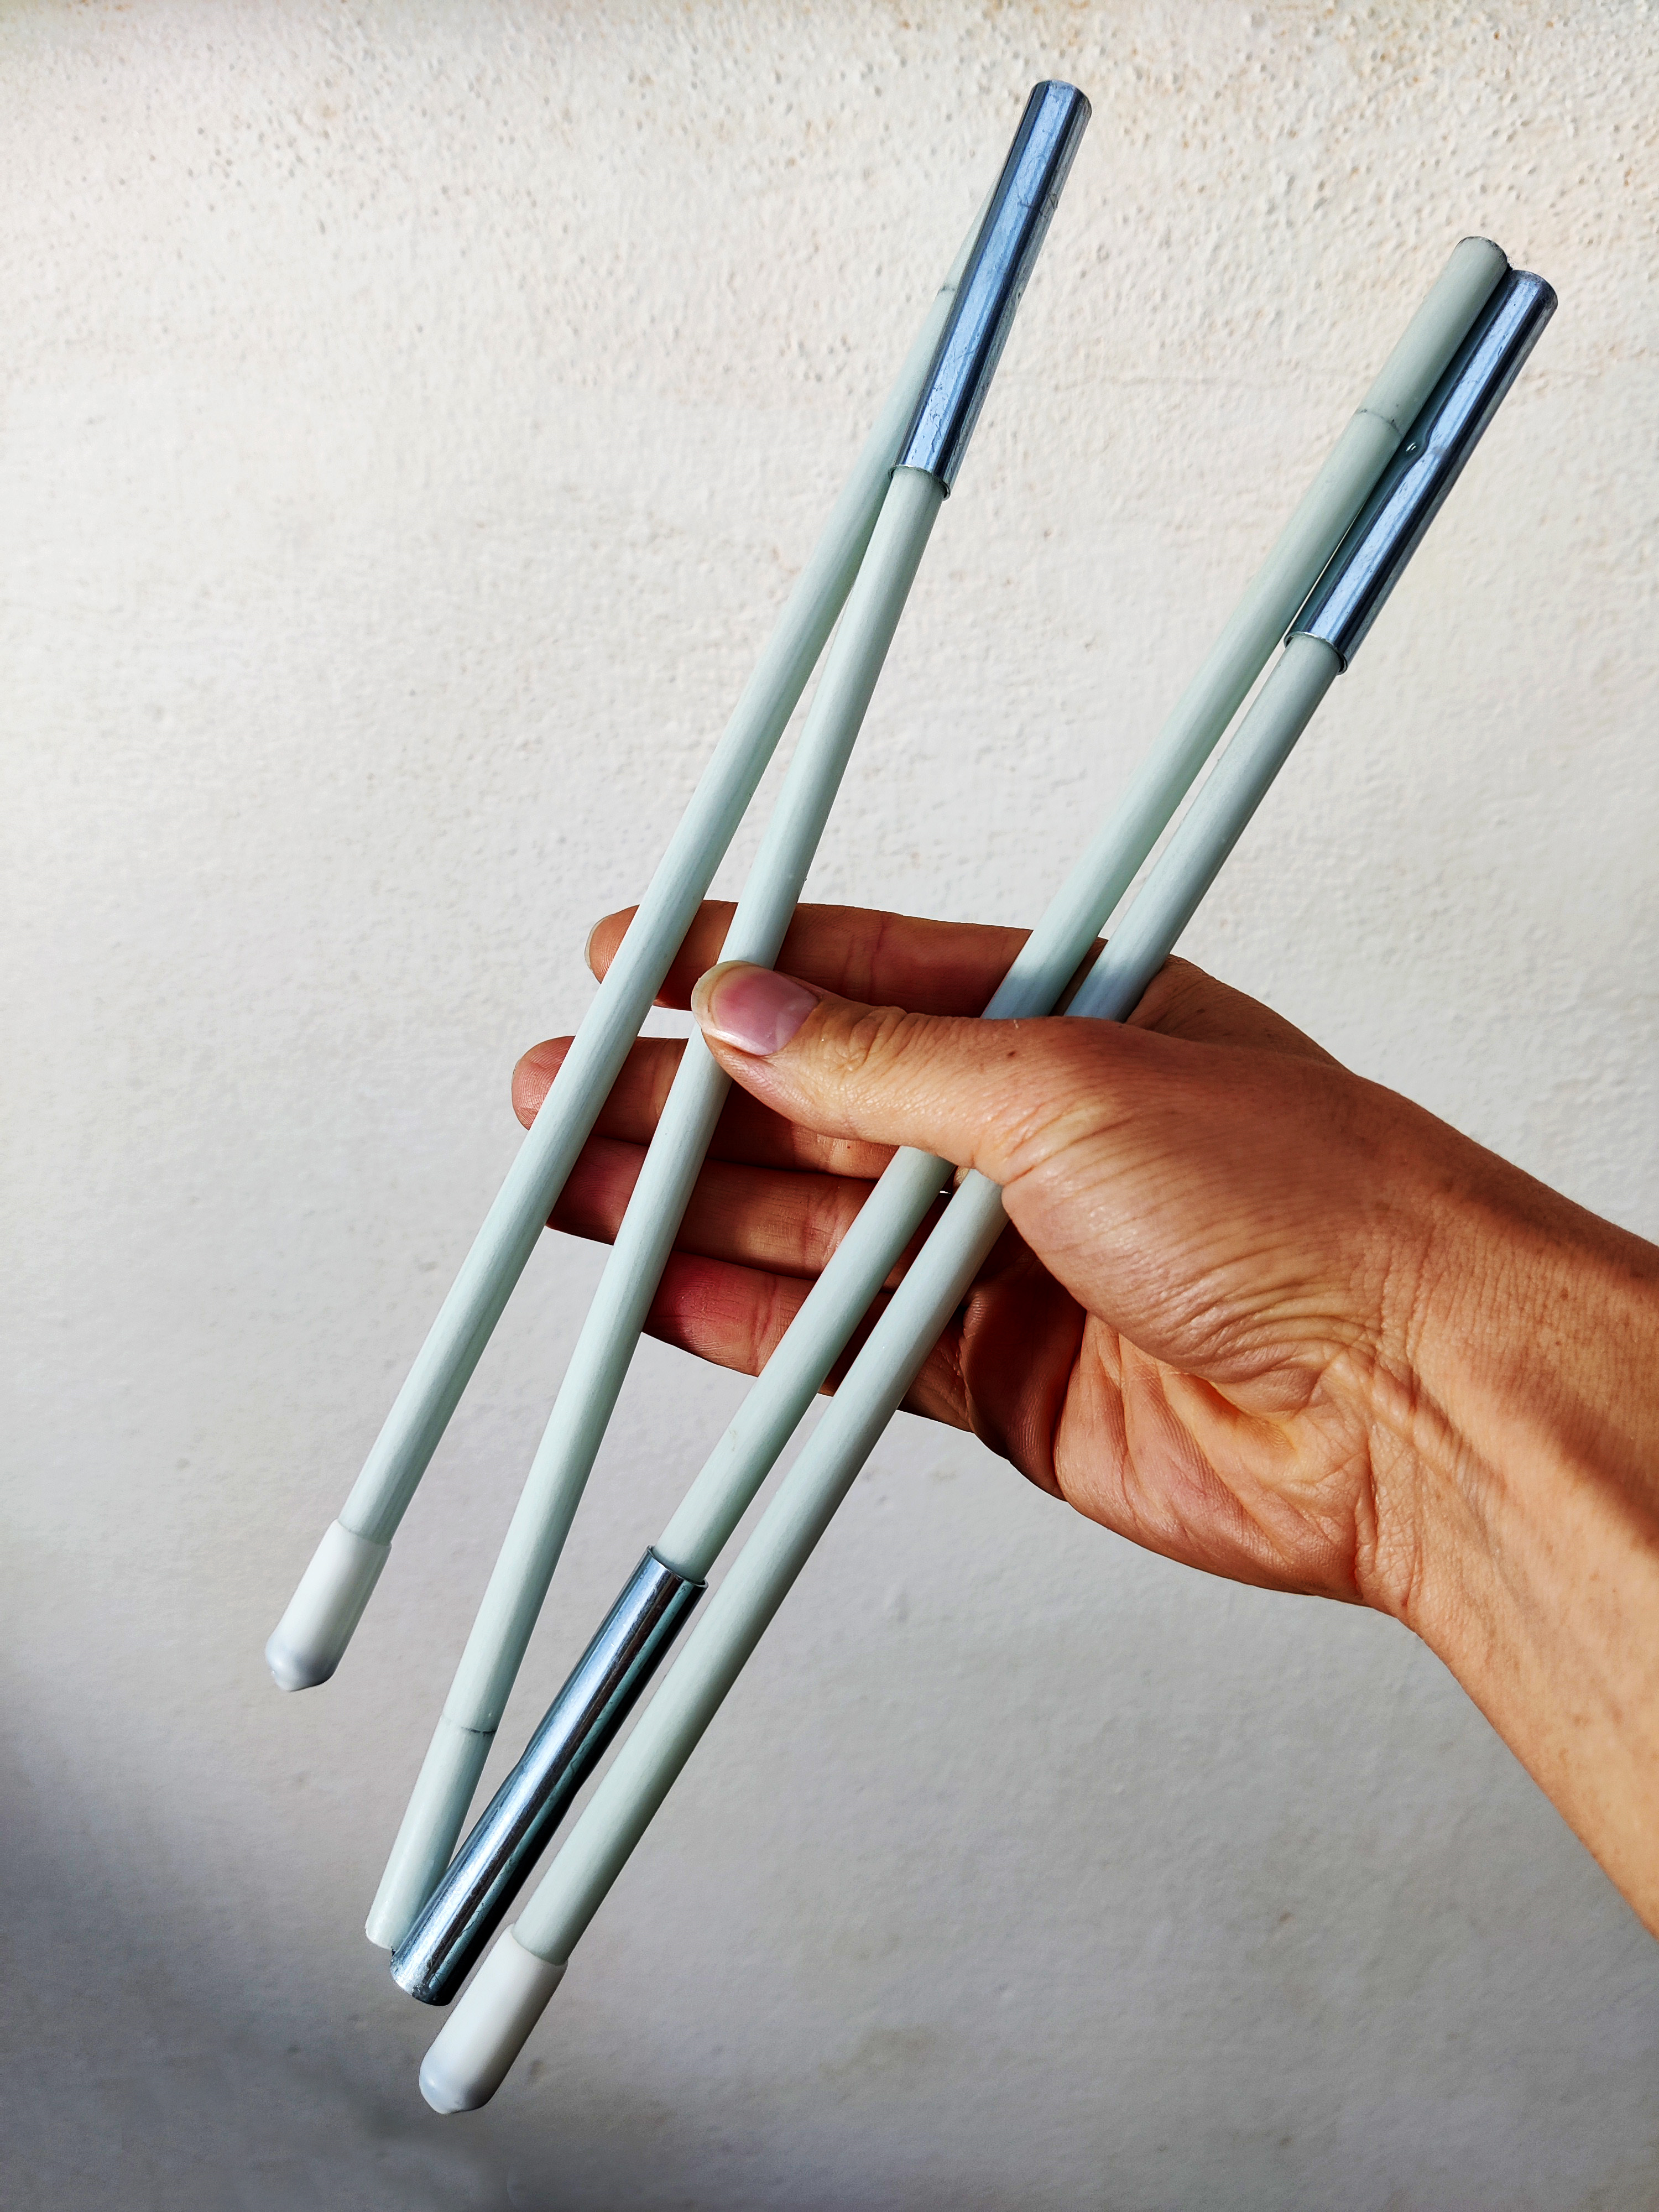
1) Unfold the cover and locate the pocket containing the lifting rod.
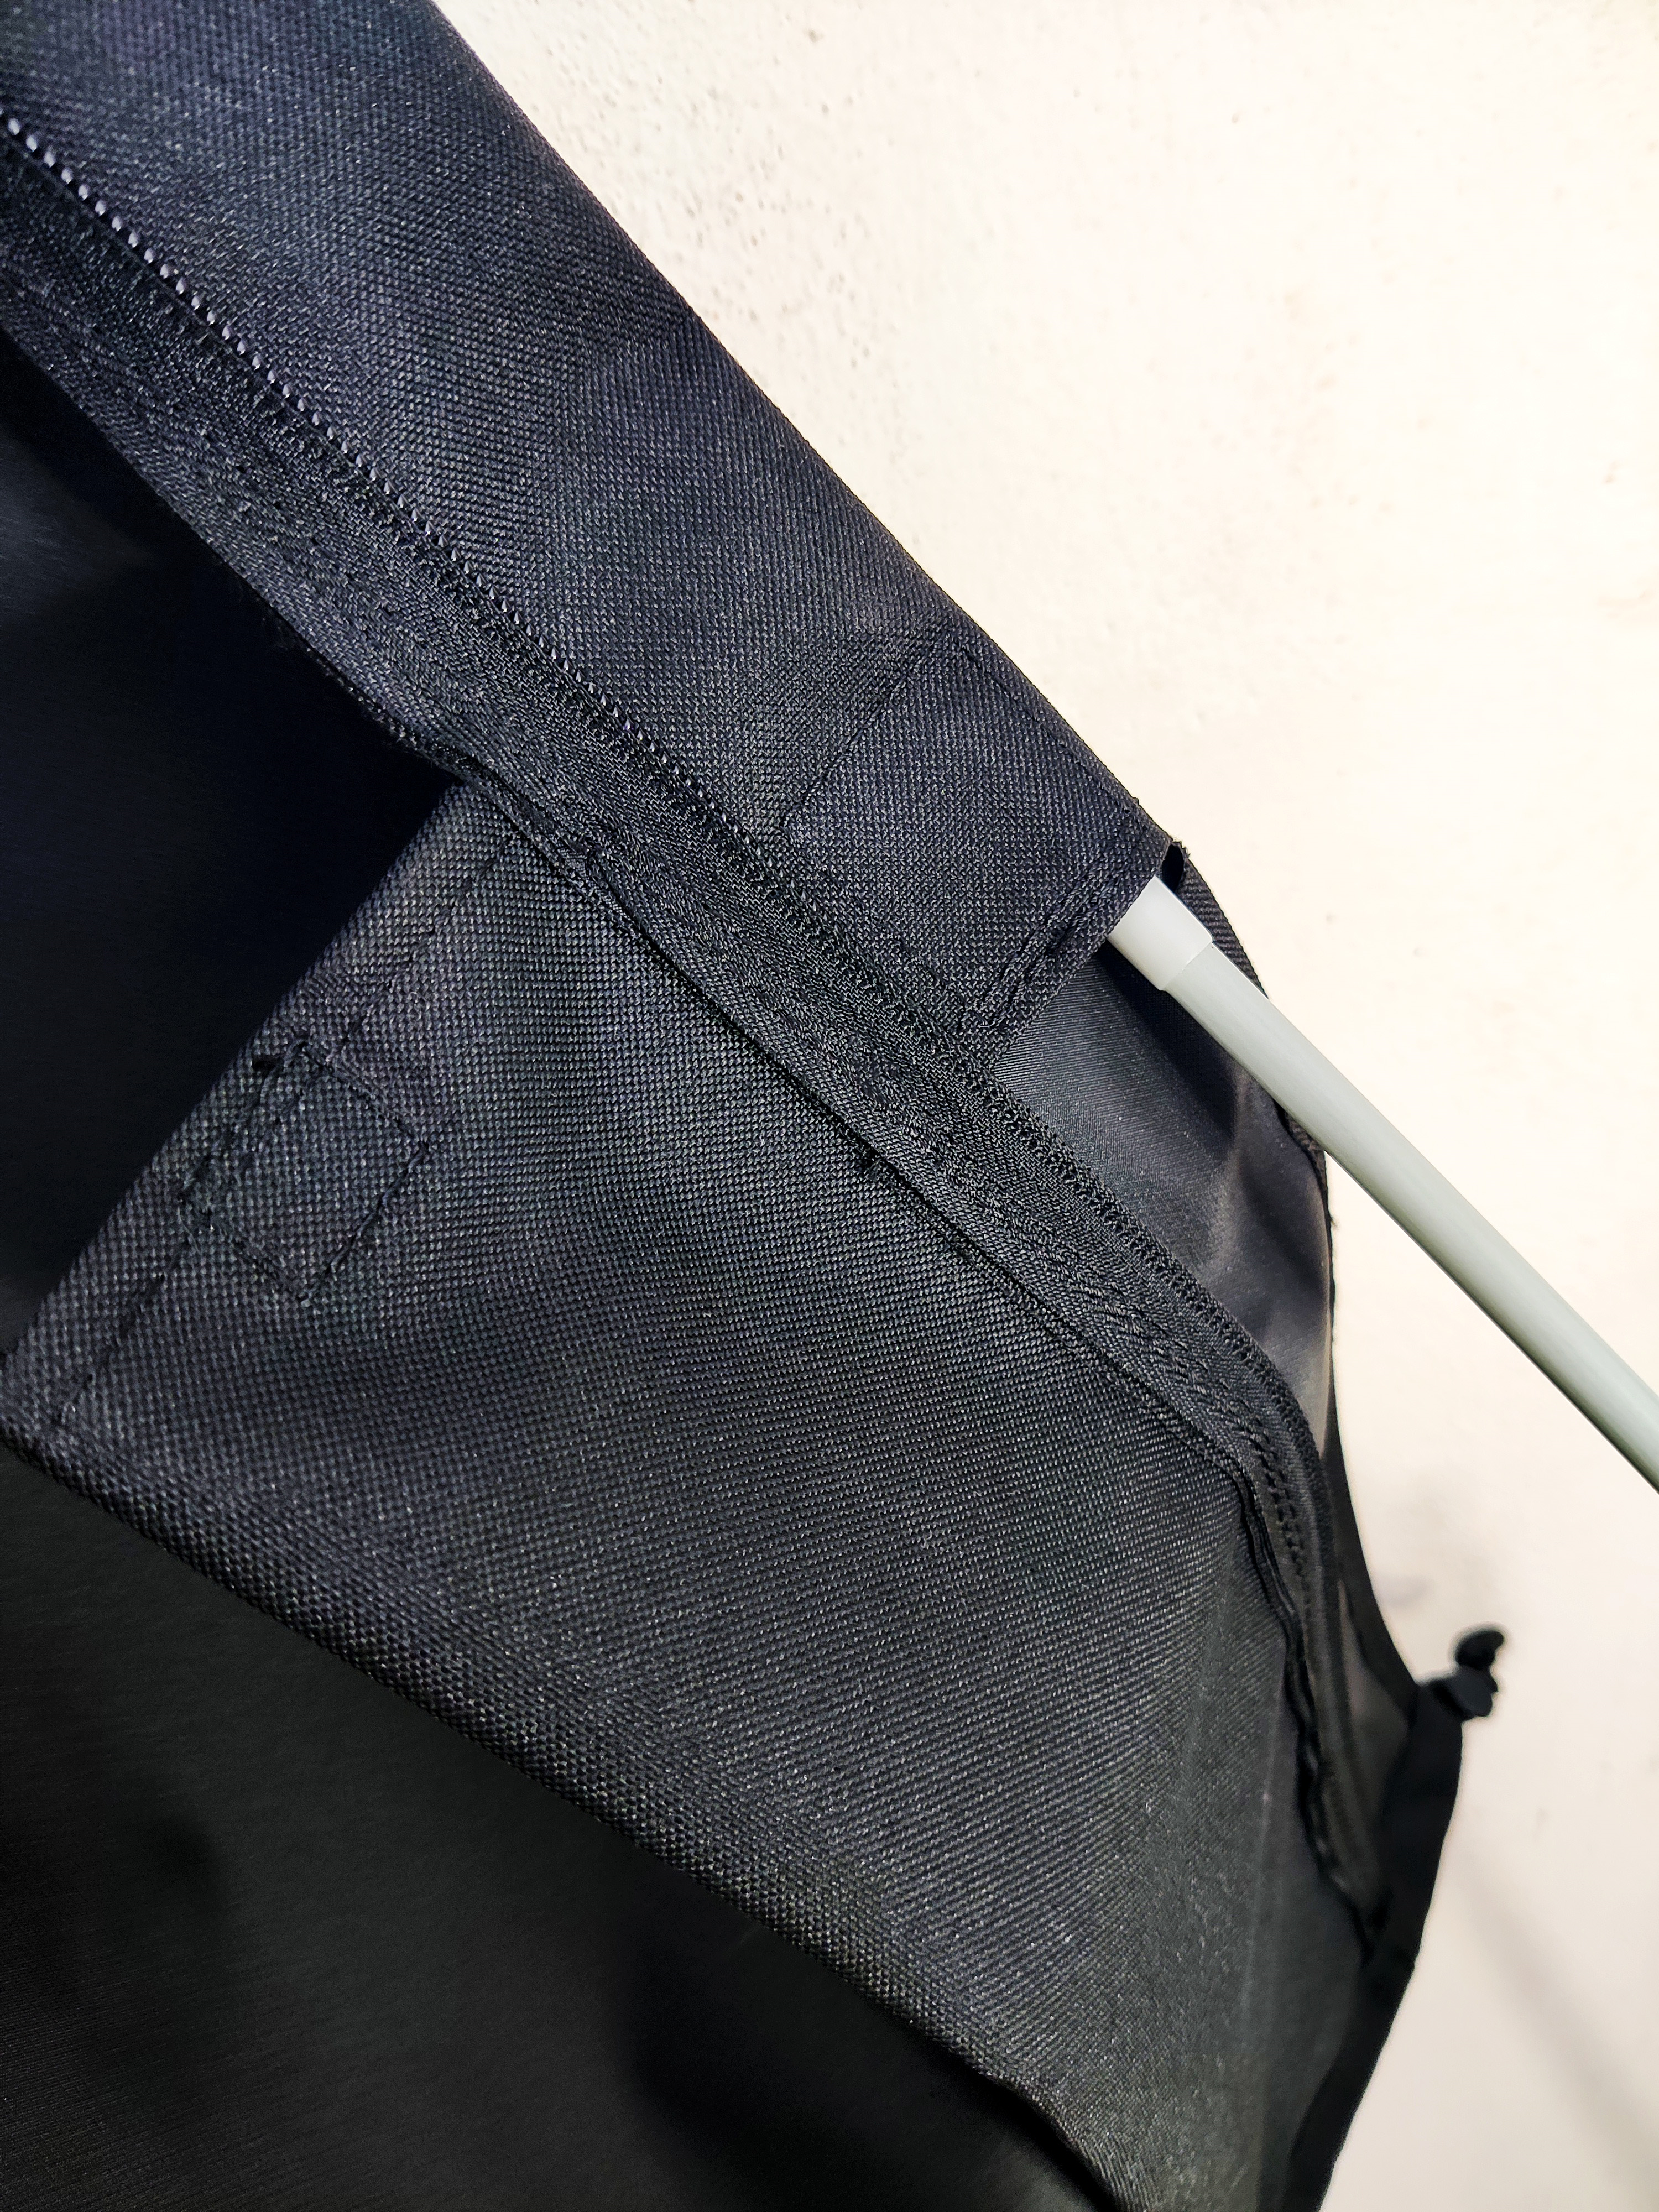
2) Place the lifting rod into the channel along the zip line of the cover.
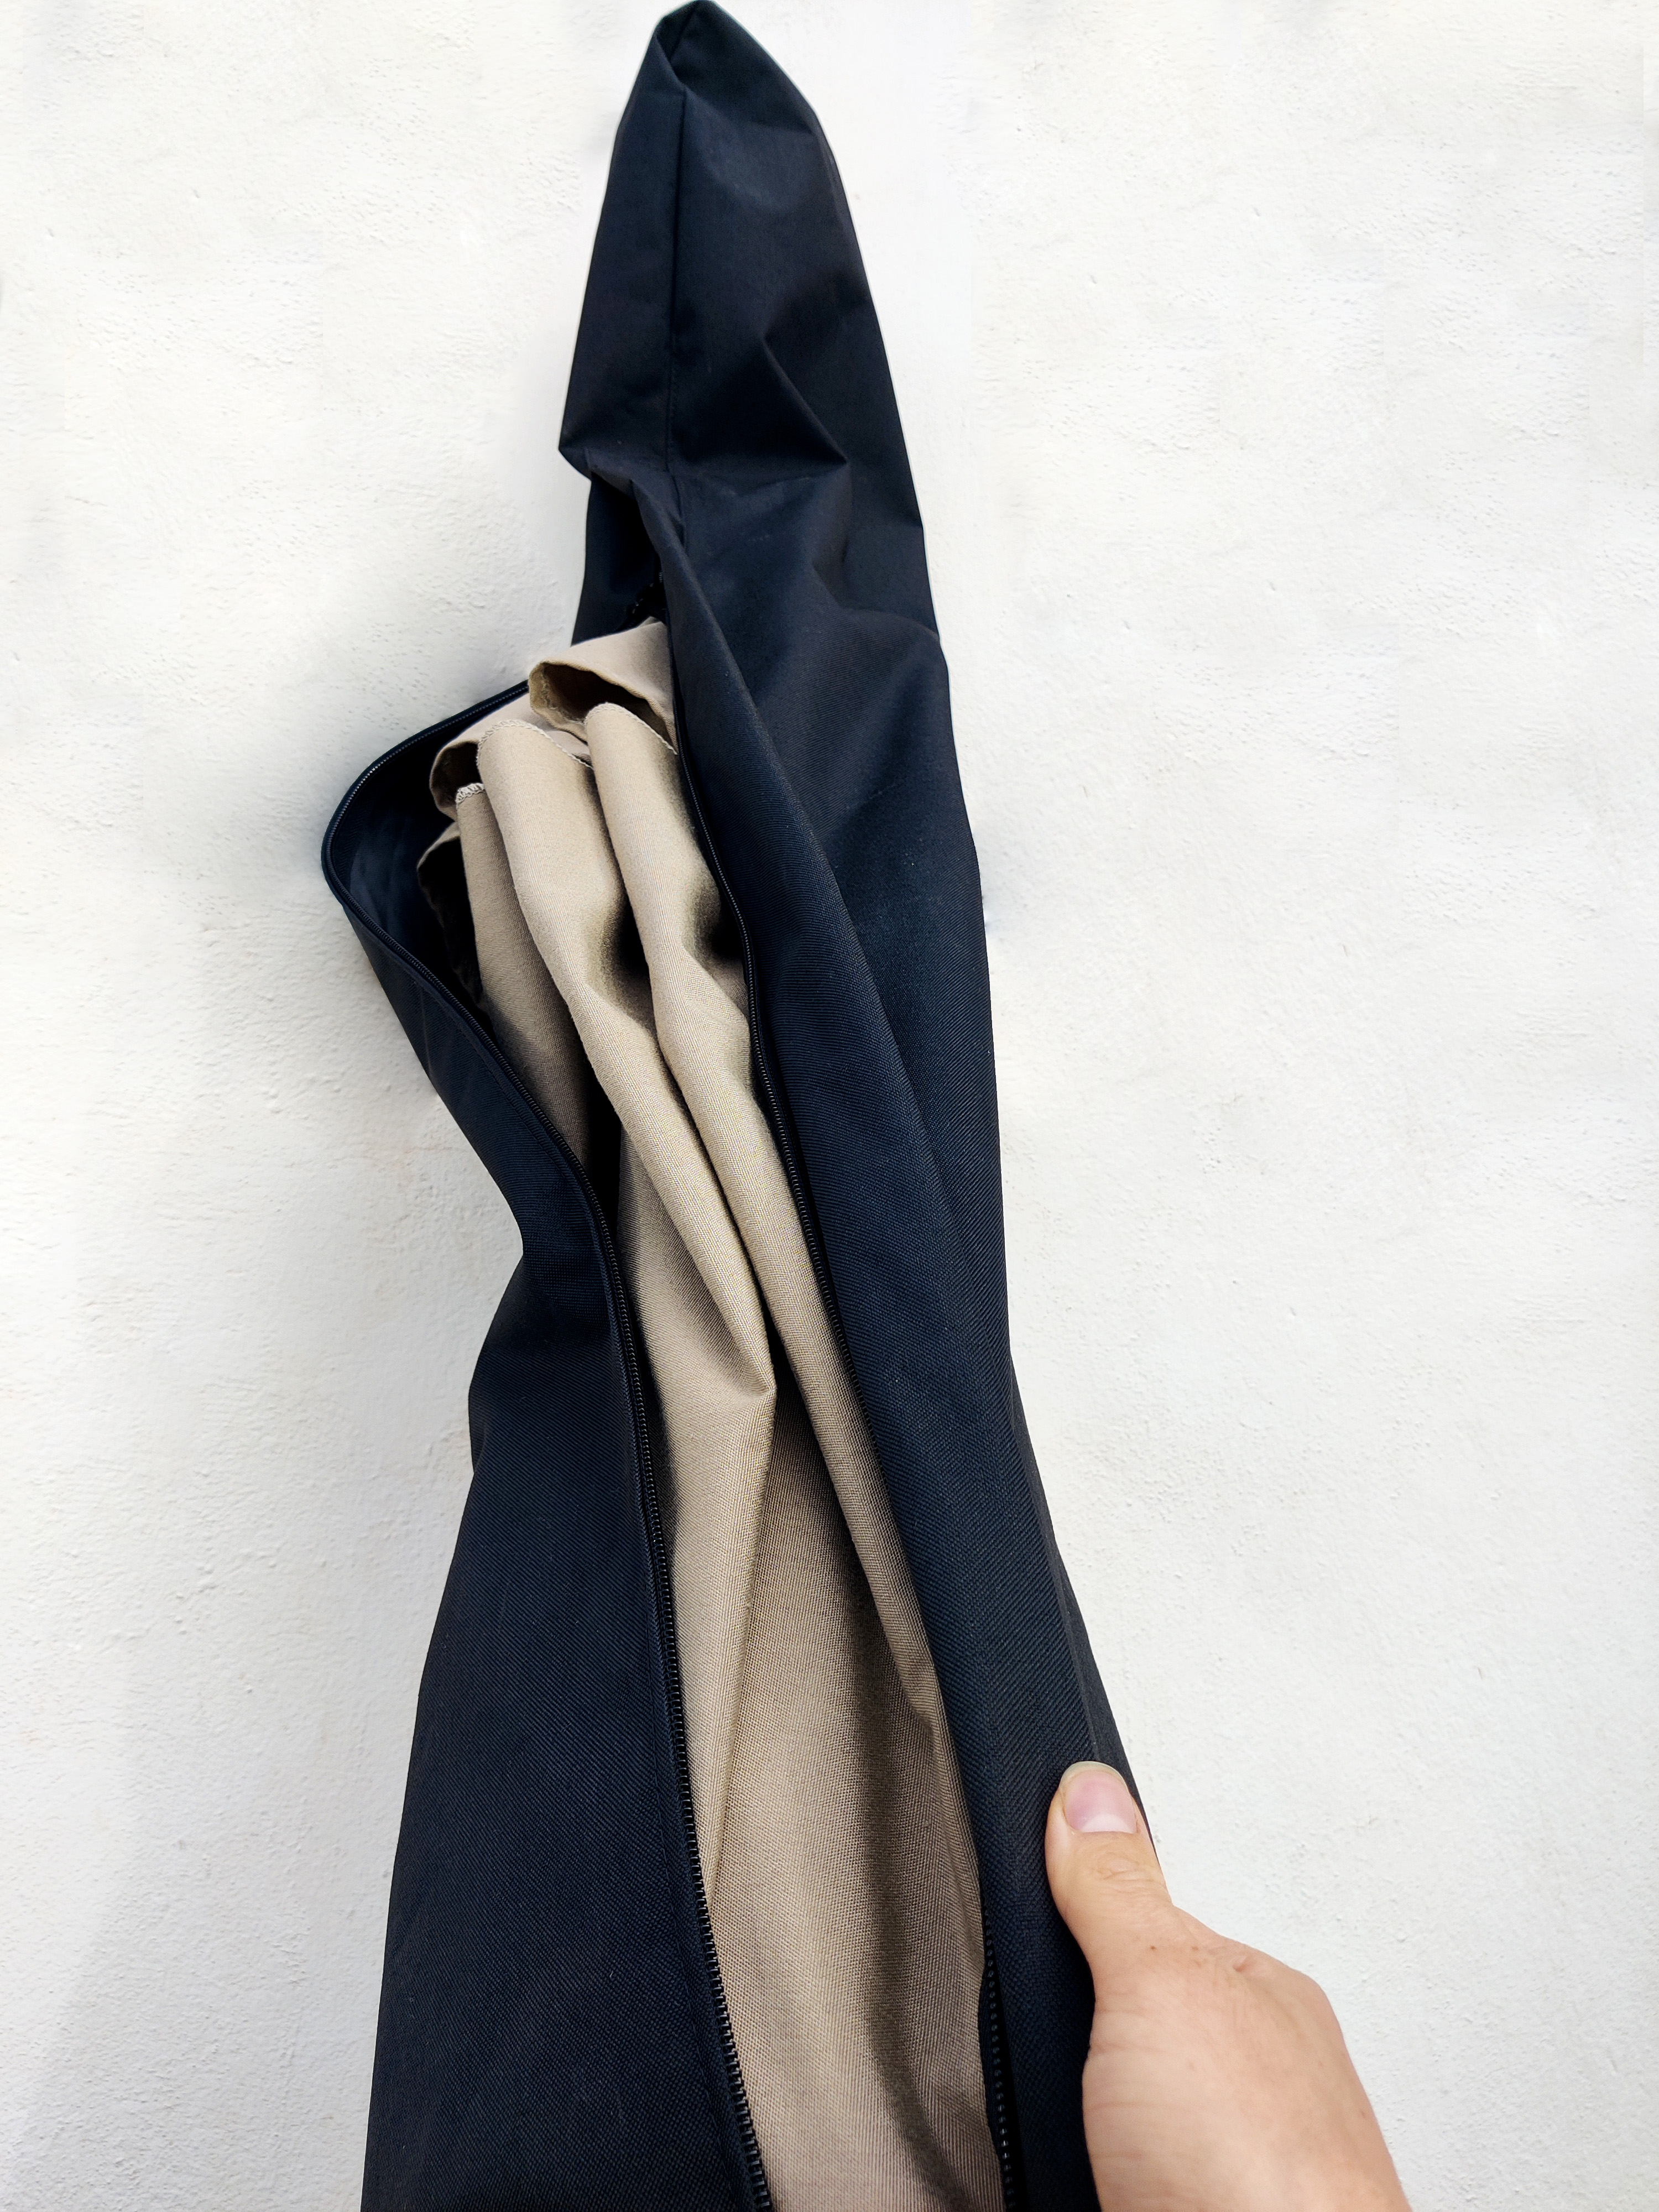
3) Slide the cover over the patio umbrella, ensuring the top sits securely.
4) Smoothly pull the zip down from top to bottom.
5) Remove the telescopic rod, if used, and store it inside the cover pocket for future use.
Umbrella or Patio Umbrella?
What is the Difference, Which Patio Umbrella to Choose & What to Look For
Assembly Guidelines for Original and Heavy Duty Umbrella Bases
Discover the effortless assembly process for all Baser products, designed to enhance your outdoor living experience. Whether you're setting up a robust Original Baser Umbrella Base or the adaptable Heavy Duty Umbrella Base, our step-by-step guides make installation a breeze, ensuring you enjoy stability and style without the hassle. Check the assembly out.
Assembly Guidelines for Spacesaver and Beach Umbrella Bases
For those with space constraints, the Baser Spacesaver/Balcony Umbrella Base and the Beach Umbrella Base offer compact, efficient solutions, perfectly balancing convenience with durability. Tailored for balconies, terraces, and sandy shores, these bases ensure your shade stays put, regardless of the setting. Check the assembly out.
Assembly Guidelines for Original Sandbags and Weight Bags
Dive into the world of weight management with our Original Sandbags and Weight Bags for Cantilevers. These accessories are key to securing cantilevers and enhancing the foundation of standard umbrella bases, providing an extra layer of stability in windy conditions. Their easy-fill design and robust materials make them an indispensable part of your outdoor setup. Check the assembly out.
Assembly Guidelines for Push and Crank Patio Umbrellas
Elevate your shade with our range of umbrellas, including the Original Push Patio Umbrella, Supreme Push Patio Umbrella, and Signature Crank Patio Umbrella. Each model is crafted for ease, offering user-friendly mechanisms that allow for seamless height and tilt adjustments. From the breezy simplicity of the push models to the precision of the crank system, Baser patio umbrellas are a testament to functional elegance. Check the assembly out.
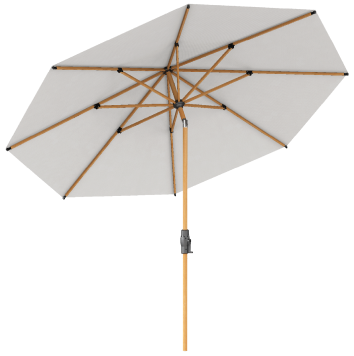
Assembly Guidelines for Baser Cantilever Patio Umbrellas
For expansive coverage, explore our Original and Supreme Cantilever Patio Umbrellas. These designs extend your shaded area without compromising on stability or style, featuring advanced tilting and rotating functions for optimal sun protection. Check the assembly out.
Assembly Guidelines for Baser Supreme Covers
Protect your investment with Baser Supreme Protective Covers, designed to shield your umbrellas from the elements. These covers extend the life of your Baser products, ensuring they remain vibrant and functional season after season. Check the assembly.
Assembly Guidelines for Baser Products
Our comprehensive assembly site covers every Baser product, providing detailed instructions and solutions to common issues. Whether you're wondering how much sand to fill your sandbags with or how to prevent your patio umbrella from spinning in the base, our guides have all the answers. Visit our assembly site for a hassle-free setup and enjoy a stable, secure, and stylish outdoor space.
Embrace the simplicity and sophistication of Baser's range of outdoor solutions. With our easy-to-follow assembly instructions, you'll have your Baser products up and ready in no time, ensuring your outdoor spaces are equipped with the best in design and durability. From umbrella bases to protective covers, Baser offers a seamless integration of quality, functionality, and aesthetic appeal, making us your go-to choice for enhancing your outdoor living experience.